共计 5232 个字符,预计需要花费 14 分钟才能阅读完成。
[v_act]一、简介[/v_act]
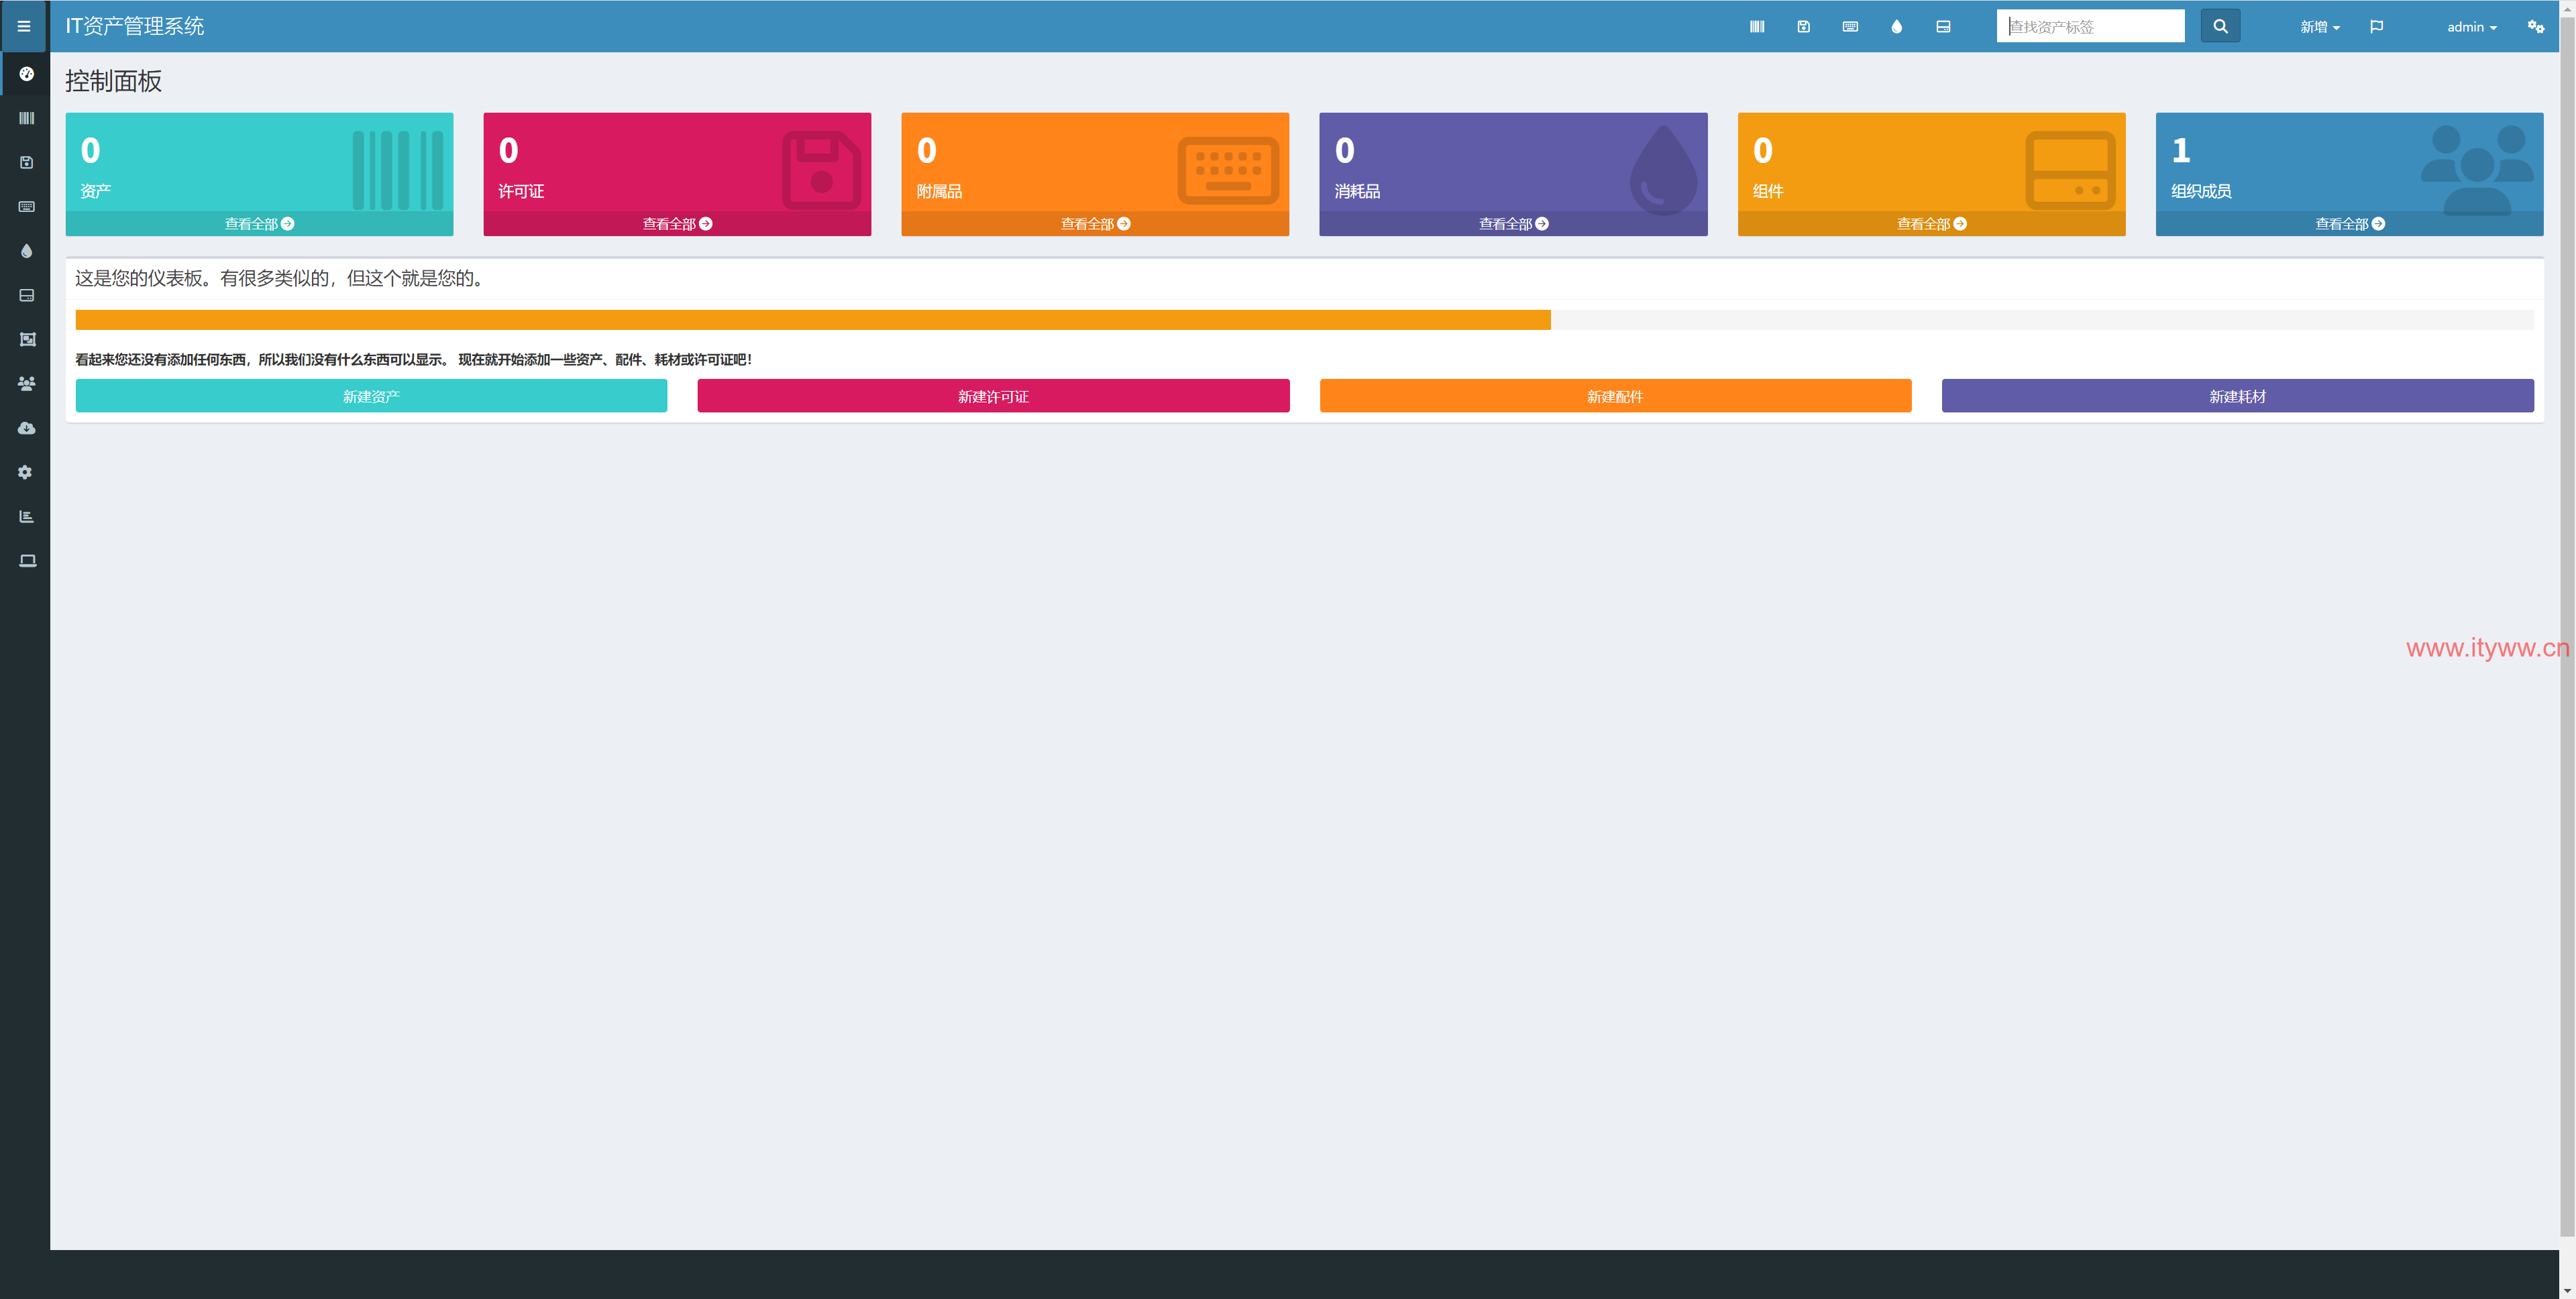
Snipe-IT 是一个基于 Laravel 的免费开源 (FOSS) 项目;专为 IT 资产管理而设计,使 IT 部门能够跟踪谁拥有哪台笔记本电脑、何时购买、有哪些软件许可证和配件可用等等。
[v_act]二、环境说明[/v_act]
系统:CentOS7.9;升级内核及软件补丁;关闭SELinux和防火墙。
[v_act]三、安装宝塔服务器运维面板[/v_act]
1、按需安装宝塔面板,步骤不在赘述。
2、通过面板安装MySQL-8.0.24环境
3、通过面板安装PHP-8.0.26环境
4、通过面板安装Nginx-1.24环境
5、通过面板安装phpmyadmin-5.2环境(此步骤非必须)
[v_act]四、获取Snipe-it程序[/v_act]
1、进入宝塔面板站点专用目录:cd /www/wwwroot/
2、使用官方推荐方式git获取程序库:git clone https://github.com/snipe/snipe-it.git
[root@snipeit wwwroot]# git clone https://github.com/snipe/snipe-it.git
Cloning into 'snipe-it'...
remote: Enumerating objects: 155385, done.
remote: Counting objects: 100% (991/991), done.
remote: Compressing objects: 100% (472/472), done.
remote: Total 155385 (delta 658), reused 772 (delta 518), pack-reused 154394
Receiving objects: 100% (155385/155385), 168.61 MiB | 1.48 MiB/s, done.
Resolving deltas: 100% (102136/102136), done.
[root@snipeit wwwroot]# ll
total 8
drwxr-xr-x  2 root root    6 Aug  8 11:55 default
drwxr-xr-x 18 root root 4096 Aug  9 22:20 snipe-it
[v_blue]如在墙内可用代理模式获取 或 下载程序获取[/v_blue]
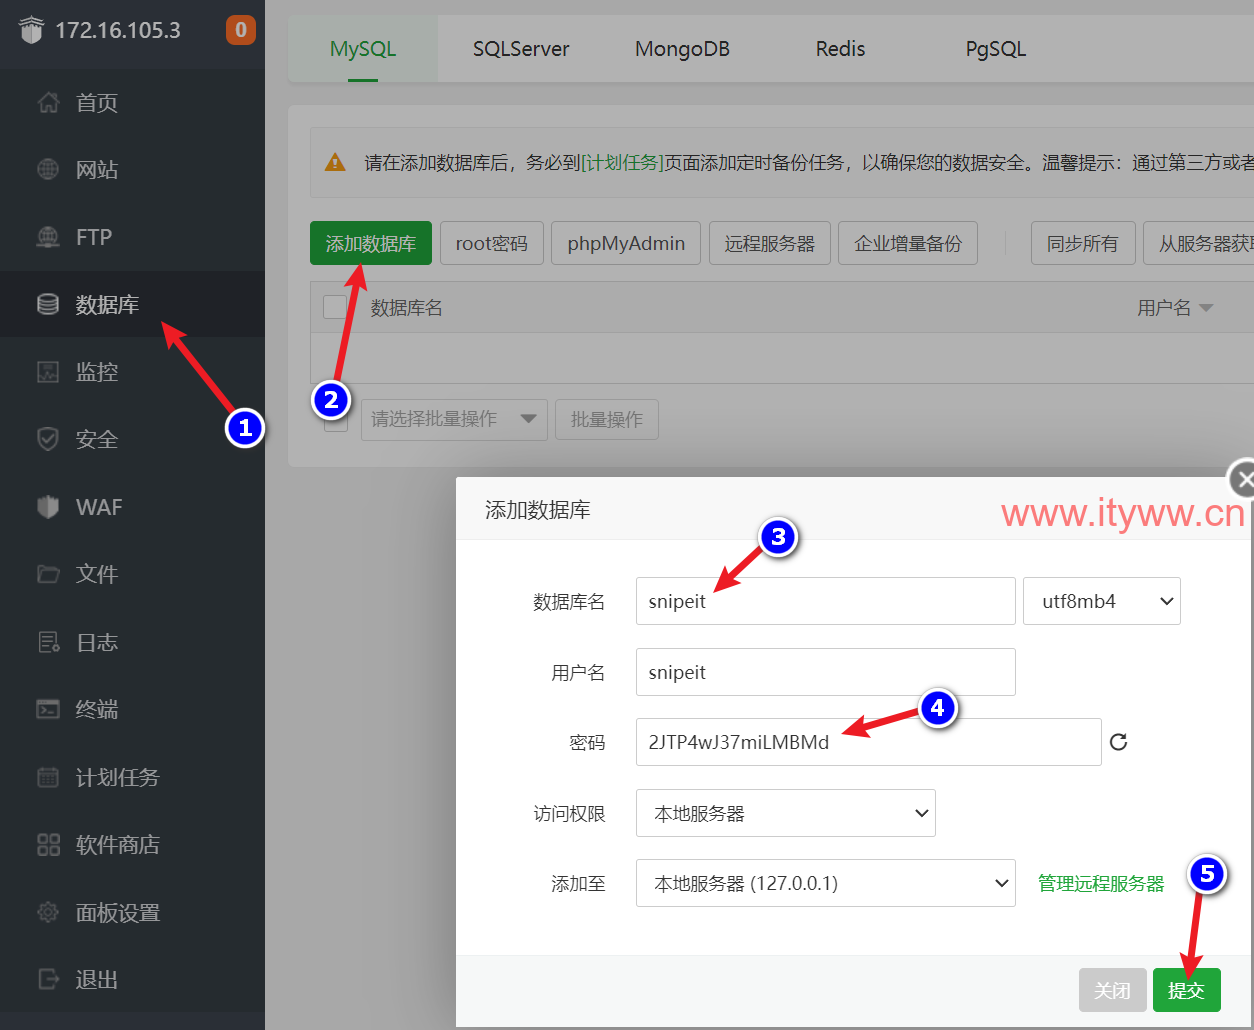
[v_act]五、创建Snipe-IT数据库[/v_act]
[v_act]六、配置PHP功能[/v_act]
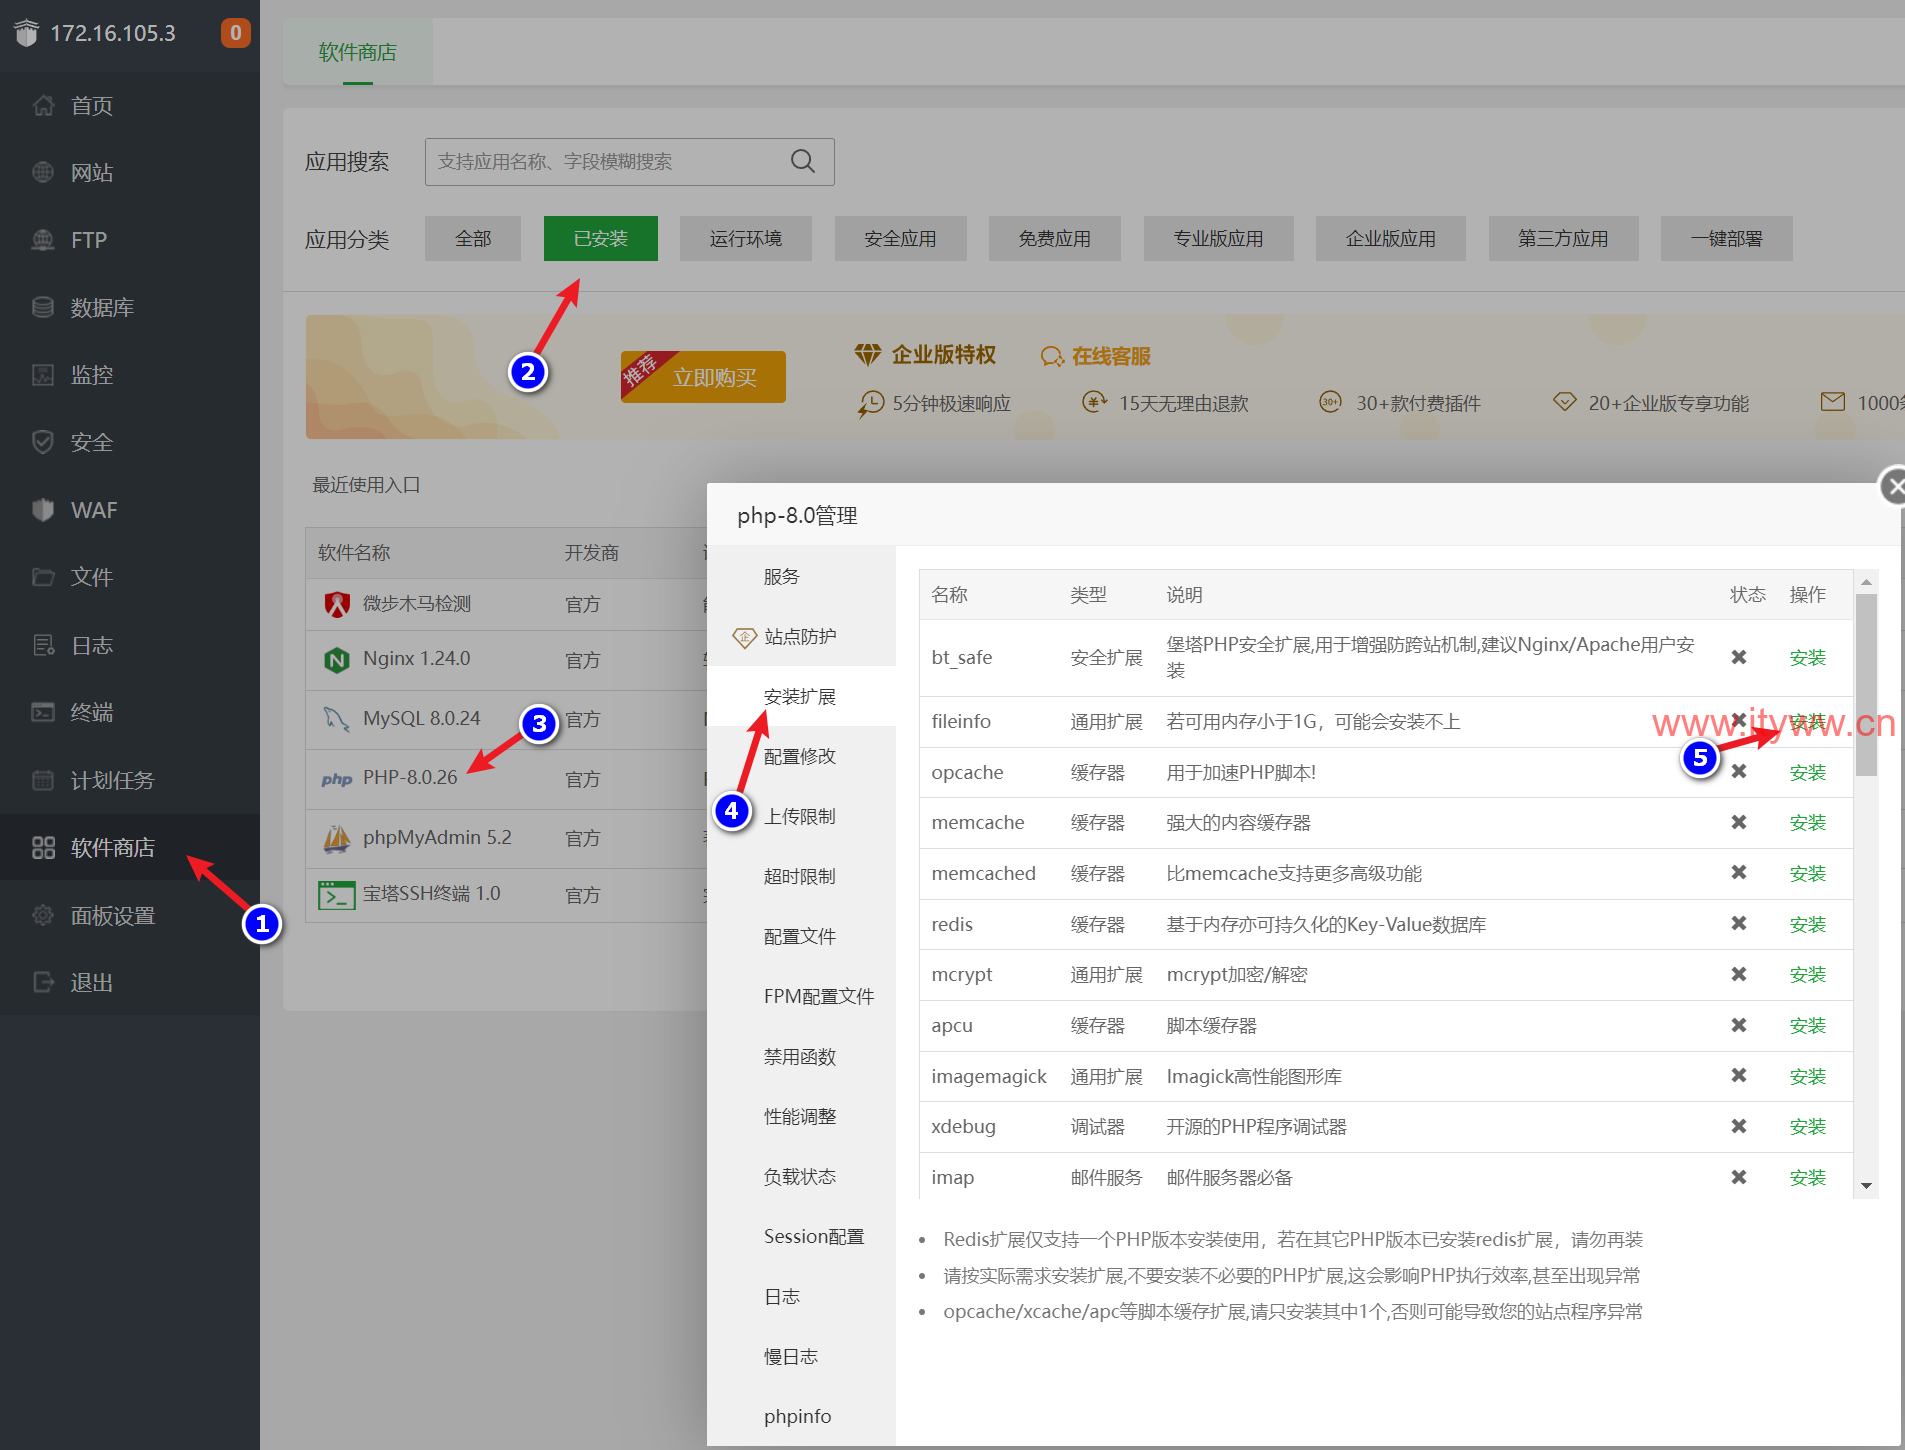
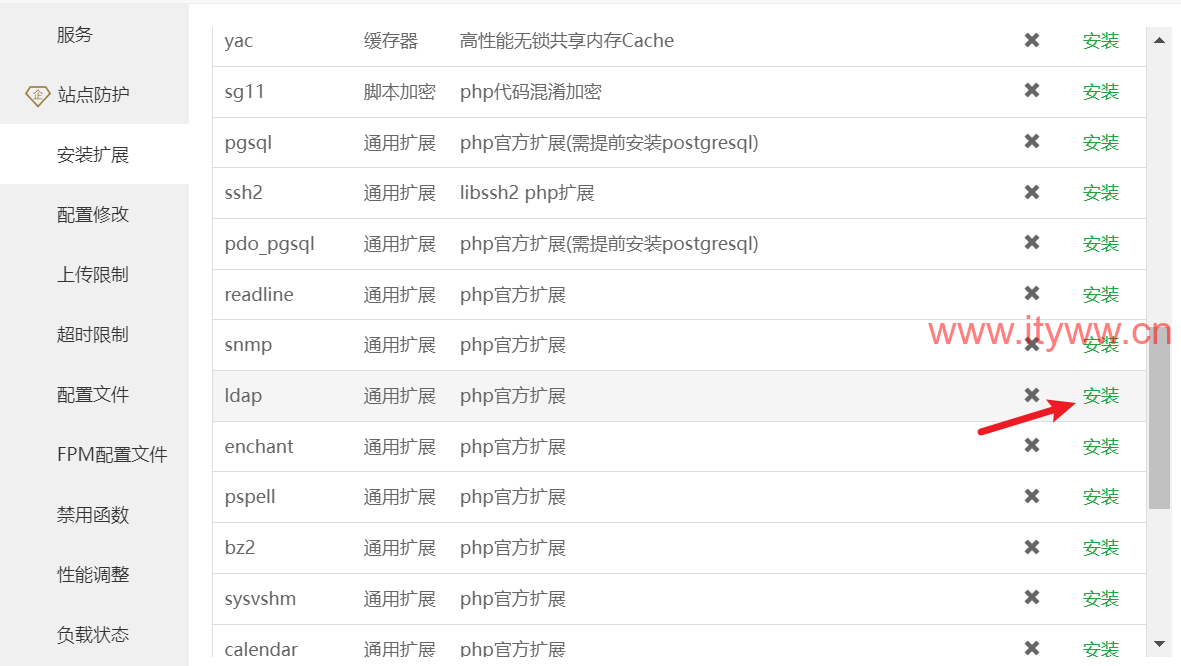
1、按需安装所需扩展:JSON、OpenSSL、PDO、Mbstring、Tokenizer、cURL、MySQLi、LDAP、PHPZIP、Fileinfo、PHP BCMath、PHP XML、PHP Sodium
[v_blue]需要手工安装Fileinfo、LDAP、Imagick(如本地已支持可忽略,通过命令php -m | grep gd可查询到gd表示支持)[/v_blue]
2、删除禁用函数(Composer需要)

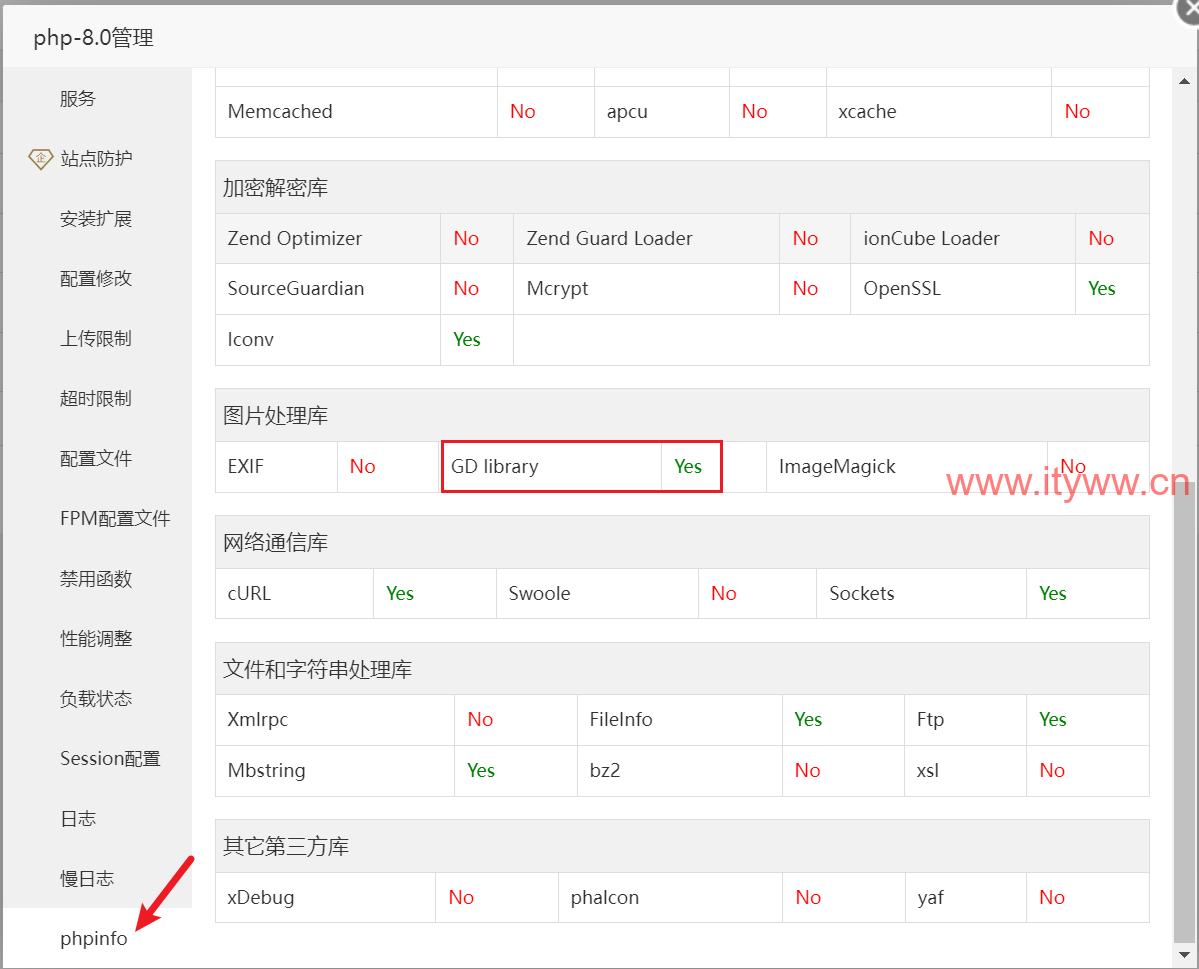
3、确认GD library
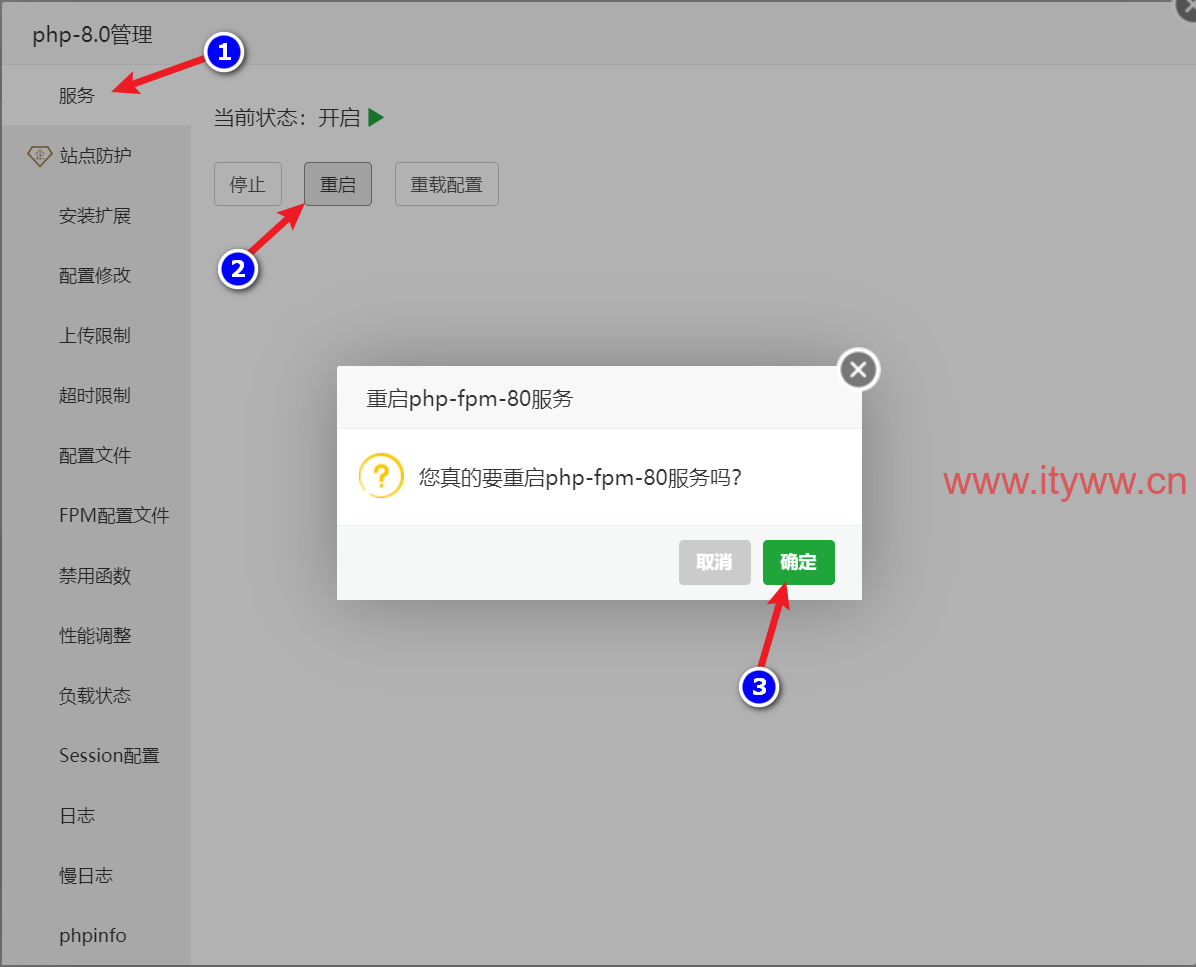
4、重启PHP服务
[v_act]七、配置Snipe-IT环境[/v_act]
1、在程序主目录下拷贝变量模版文件:cp .env.example .env
2、编辑修改变量文件:vim .env
# --------------------------------------------
# REQUIRED: BASIC APP SETTINGS
# --------------------------------------------
APP_ENV=production
APP_DEBUG=false
APP_KEY=ChangeMe
APP_URL=http://itzc.cogenda.com.cn    #定义访问地址,很重要,后续图片功能都依赖这个访问地址。
APP_TIMEZONE='Asia/Shanghai'    #定义时区
APP_LOCALE=zh-CN    #定义默认语言
MAX_RESULTS=500

# --------------------------------------------
# REQUIRED: DATABASE SETTINGS
# --------------------------------------------
DB_CONNECTION=mysql
DB_HOST=127.0.0.1    #定义数据库连接地址
DB_PORT=3306    #定义数据库连接端口
DB_DATABASE=snipeit    #定义数据库名称
DB_USERNAME=snipeit    #定义数据库用户名
DB_PASSWORD=SzjZdrGCPSNJWZwN    #定义数据库用户密码
DB_PREFIX=null
DB_DUMP_PATH='/usr/bin'    #定义数据库DUMP命令变量位置,一般无需修改
DB_CHARSET=utf8mb4
DB_COLLATION=utf8mb4_unicode_ci

# --------------------------------------------
3、设置目录权限:宝塔面板站点专用账户为www
3.1、配置主目录为www专用账户:chown -R www:www ../snipe-it
3.2、配置指定目录为www专用账户(执行过上面命令此步骤可忽略):chown -R www:www storage public/uploads bootstrap/cache/
3.3、配置执行目录为755格式:chmod -R 755 storage public/uploads bootstrap/cache/
[v_act]八、通过Composer安装PHP依赖项[/v_act]
1、进入程序安装目录:cd /www/wwwroot/snipe-it/
2、获取Composer:curl -sS https://getcomposer.org/installer | php
[root@snipeit snipe-it]# curl -sS https://getcomposer.org/installer | php
All settings correct for using Composer
Downloading...

Composer (version 2.5.8) successfully installed to: /www/wwwroot/snipe-it/composer.phar
Use it: php composer.phar
3、更换国内源:php composer.phar config repo.packagist composer https://mirrors.aliyun.com/composer/
[root@snipeit snipe-it]# php composer.phar config repo.packagist composer https://mirrors.aliyun.com/composer/
Do not run Composer as root/super user! See https://getcomposer.org/root for details
Continue as root/super user [yes]? yes
[v_blue]虽然更换了国内源,但在我安装时还是很慢,感觉跟没换一样,没搞清楚。如果有知情者告知我不胜感谢!!![/v_blue]
4、安装依赖项:php composer.phar install –no-dev –prefer-source
[root@snipeit snipe-it]# php composer.phar install --no-dev --prefer-source
Do not run Composer as root/super user! See https://getcomposer.org/root for details
Continue as root/super user [yes]? yes
Installing dependencies from lock file
Verifying lock file contents can be installed on current platform.
Warning: The lock file is not up to date with the latest changes in composer.json. You may be getting outdated dependencies. It is recommended that you run `composer update` or `composer update `.
Package operations: 168 installs, 0 updates, 0 removals
  - Installing symfony/deprecation-contracts (v2.5.2): Cloning e8b495ea28
The authenticity of host 'github.com (20.205.243.166)' can't be established.
ECDSA key fingerprint is SHA256:p2QAMXNIC1TJYWeIOttrVc98/R1BUFWu3/LiyKgUfQM.
ECDSA key fingerprint is MD5:7b:99:81:1e:4c:91:a5:0d:5a:2e:2e:80:13:3f:24:ca.
Are you sure you want to continue connecting (yes/no)? yes
Cloning failed using an ssh key for authentication, enter your GitHub credentials to access private repos
When working with _public_ GitHub repositories only, head to https://github.com/settings/tokens/new?scopes=&description=Composer+on+snipeit+2023-08-11+2319 to retrieve a token.
This token will have read-only permission for public information only.
When you need to access _private_ GitHub repositories as well, go to https://github.com/settings/tokens/new?scopes=repo&description=Composer+on+snipeit+2023-08-11+2319
Note that such tokens have broad read/write permissions on your behalf, even if not needed by Composer.
Tokens will be stored in plain text in "/root/.config/composer/auth.json" for future use by Composer.
For additional information, check https://getcomposer.org/doc/articles/authentication-for-private-packages.md#github-oauth
Token (hidden):实际的Token输入处
Token stored successfully.
[v_blue]当出现此提示需要Token时请访问给出的第一个链接地址并登陆GitHub账户后创建一个访问Token后把得到的值输入回车即可。[/v_blue]
[v_act]九、生成APP-Key:php artisan key:generate[/v_act]
[root@snipeit snipe-it]# php artisan key:generate
**************************************
*     Application In Production!     *
**************************************

 Do you really wish to run this command? (yes/no) [no]:
 > yes

Application key set successfully.
[v_act]十、配置Snipe-it程序站点[/v_act]
1、配置访问域名
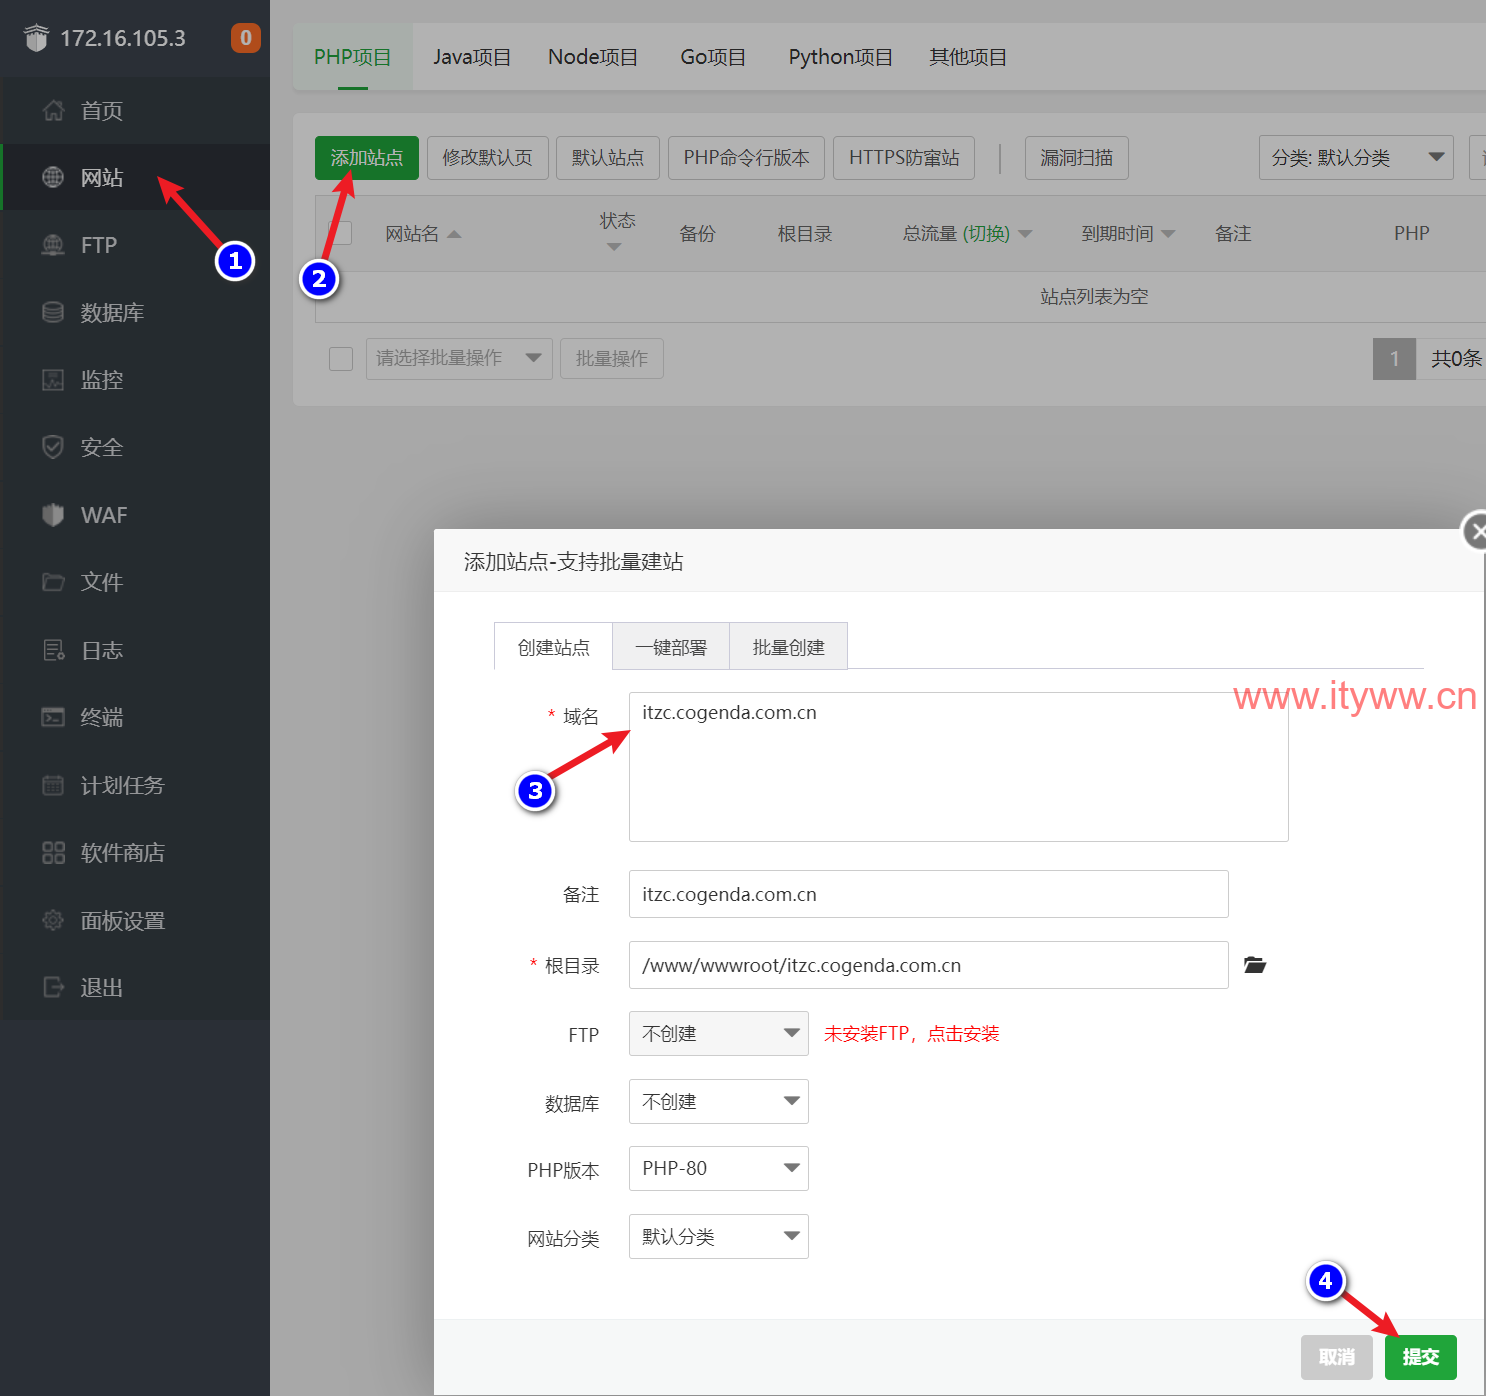
2、通过宝塔面板删除刚创建的站点目录,并且把snip-it目录改名为刚创建的目录名。


3、配置站点运行目录
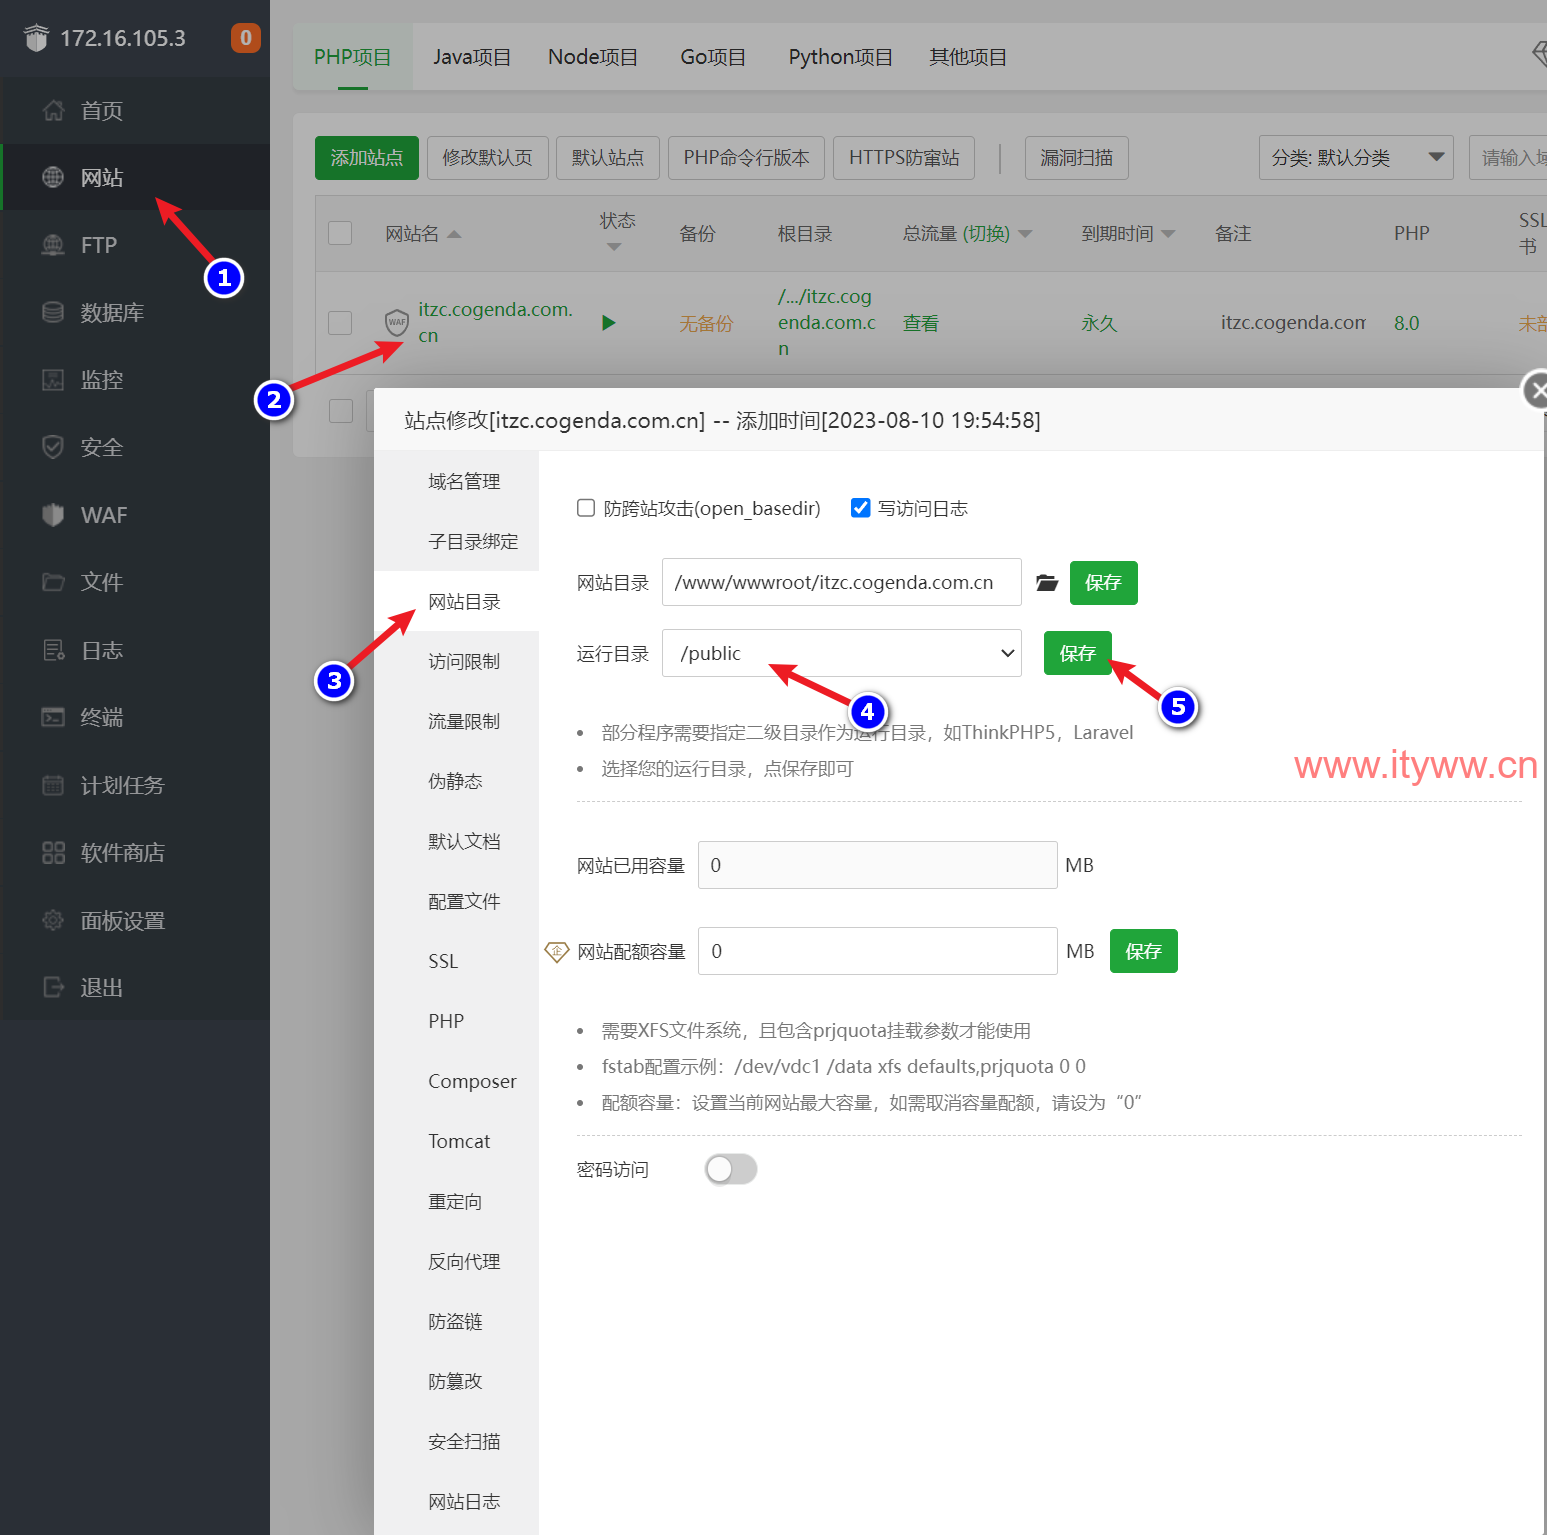
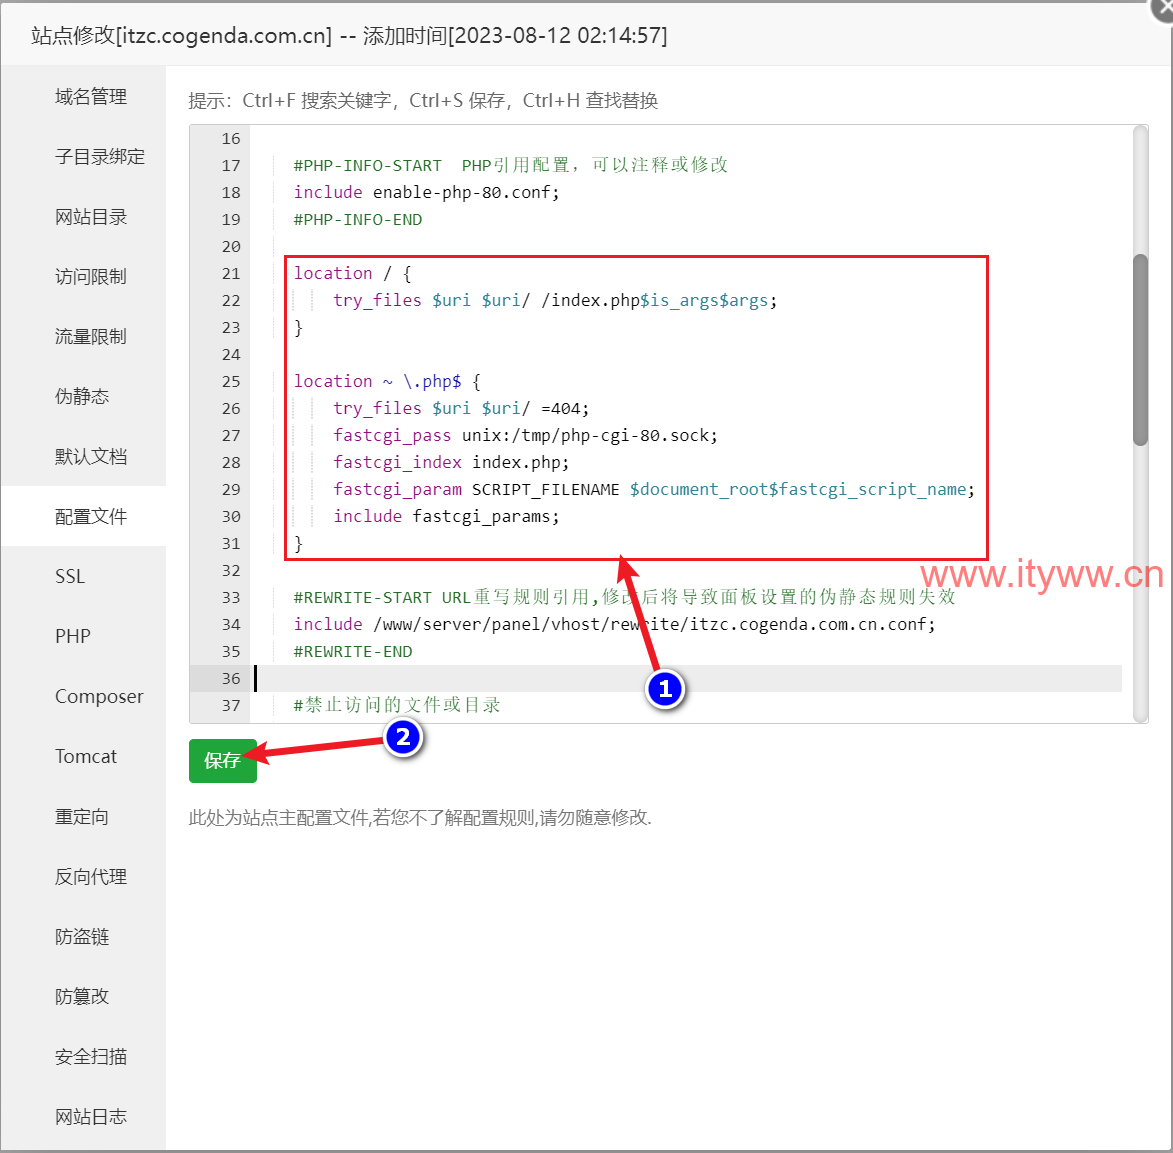
4、配置文件中增加站点配置
5、重启Nginx服务
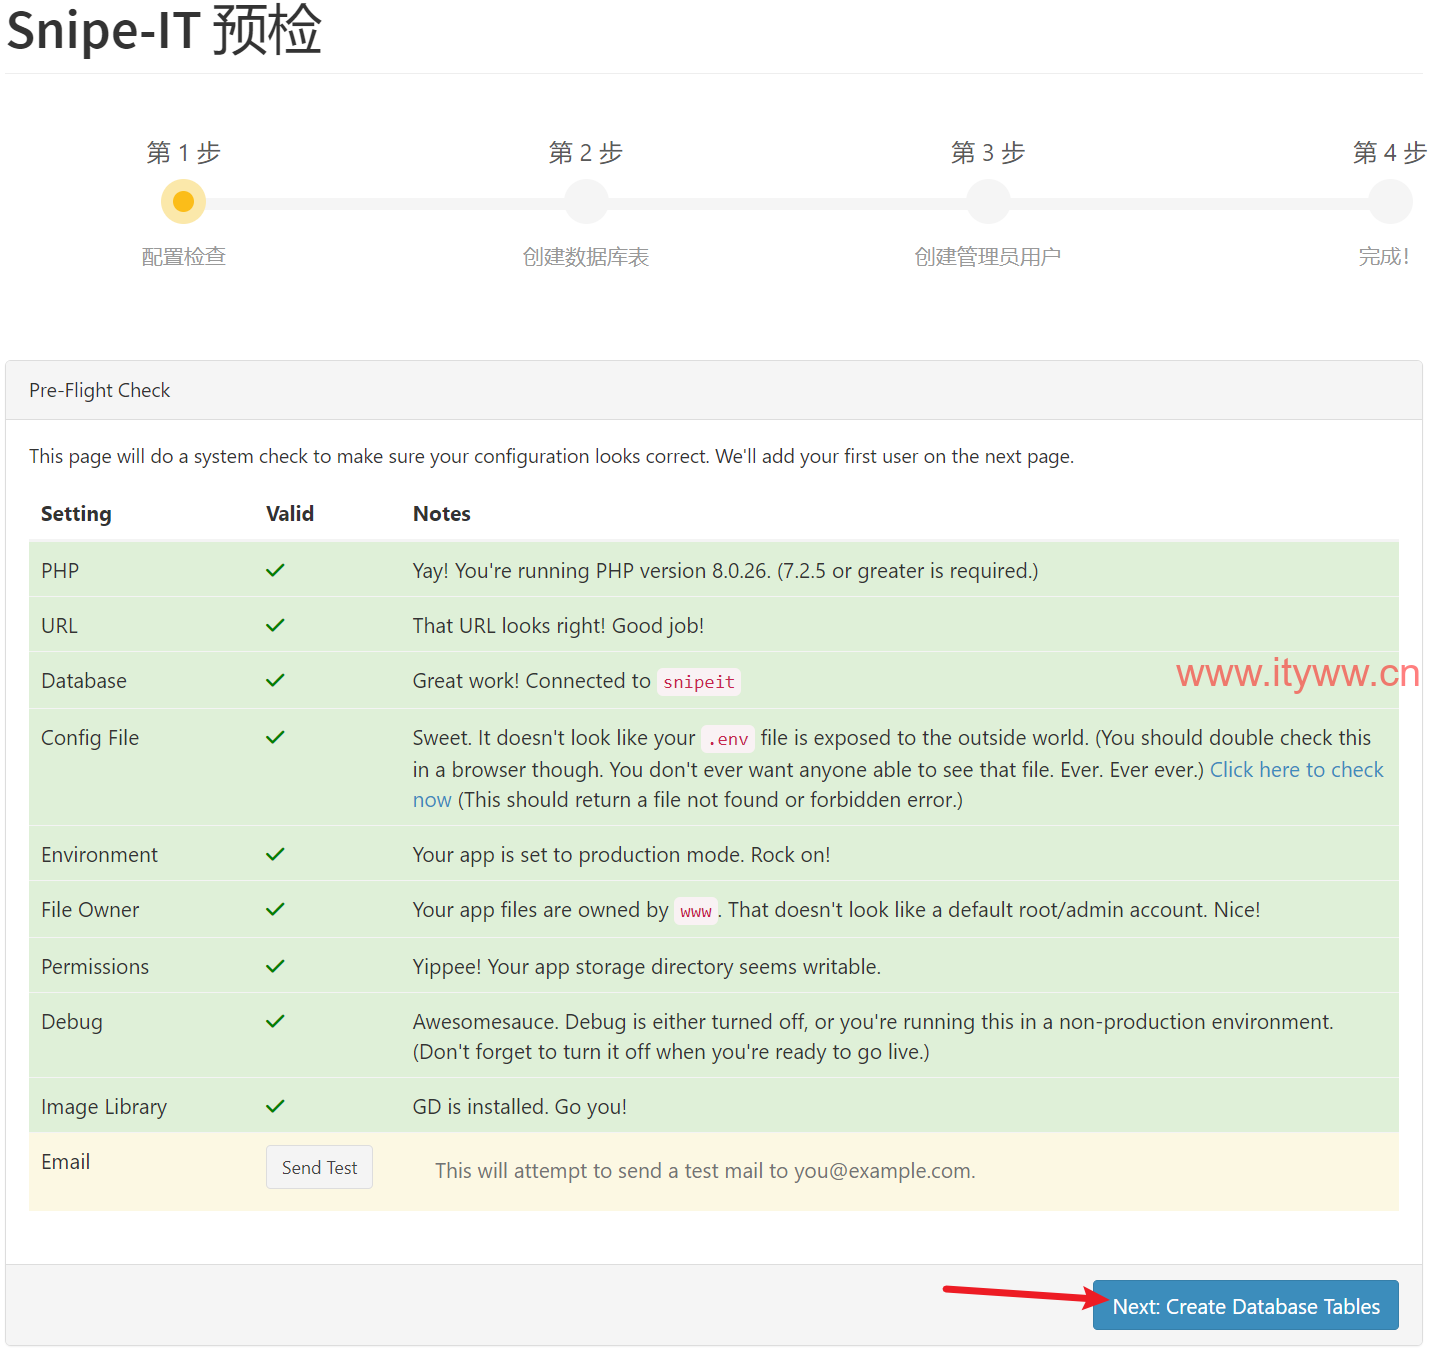
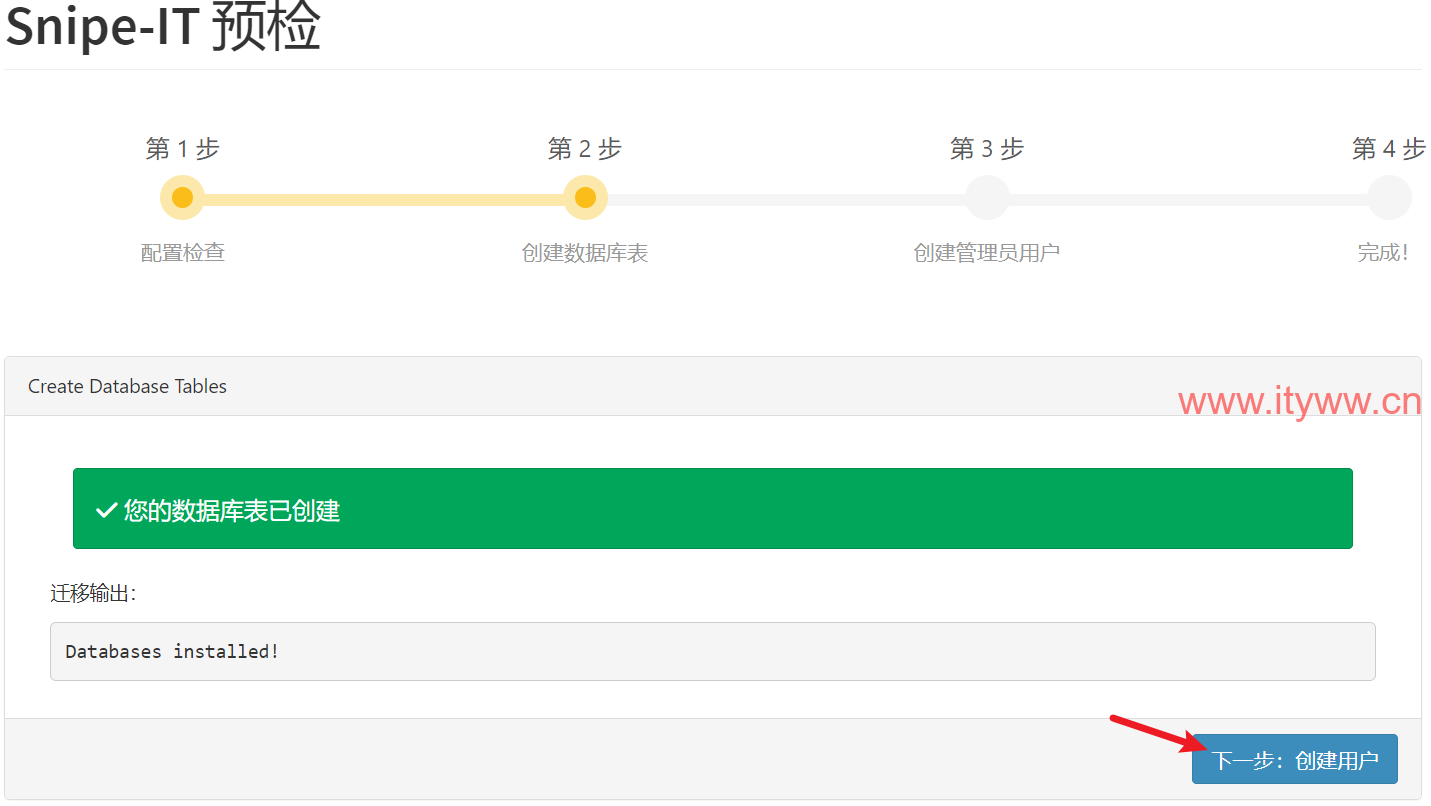
[v_act]十一、Snipe-it站点初始化:访问站点定义的域名地址[/v_act]
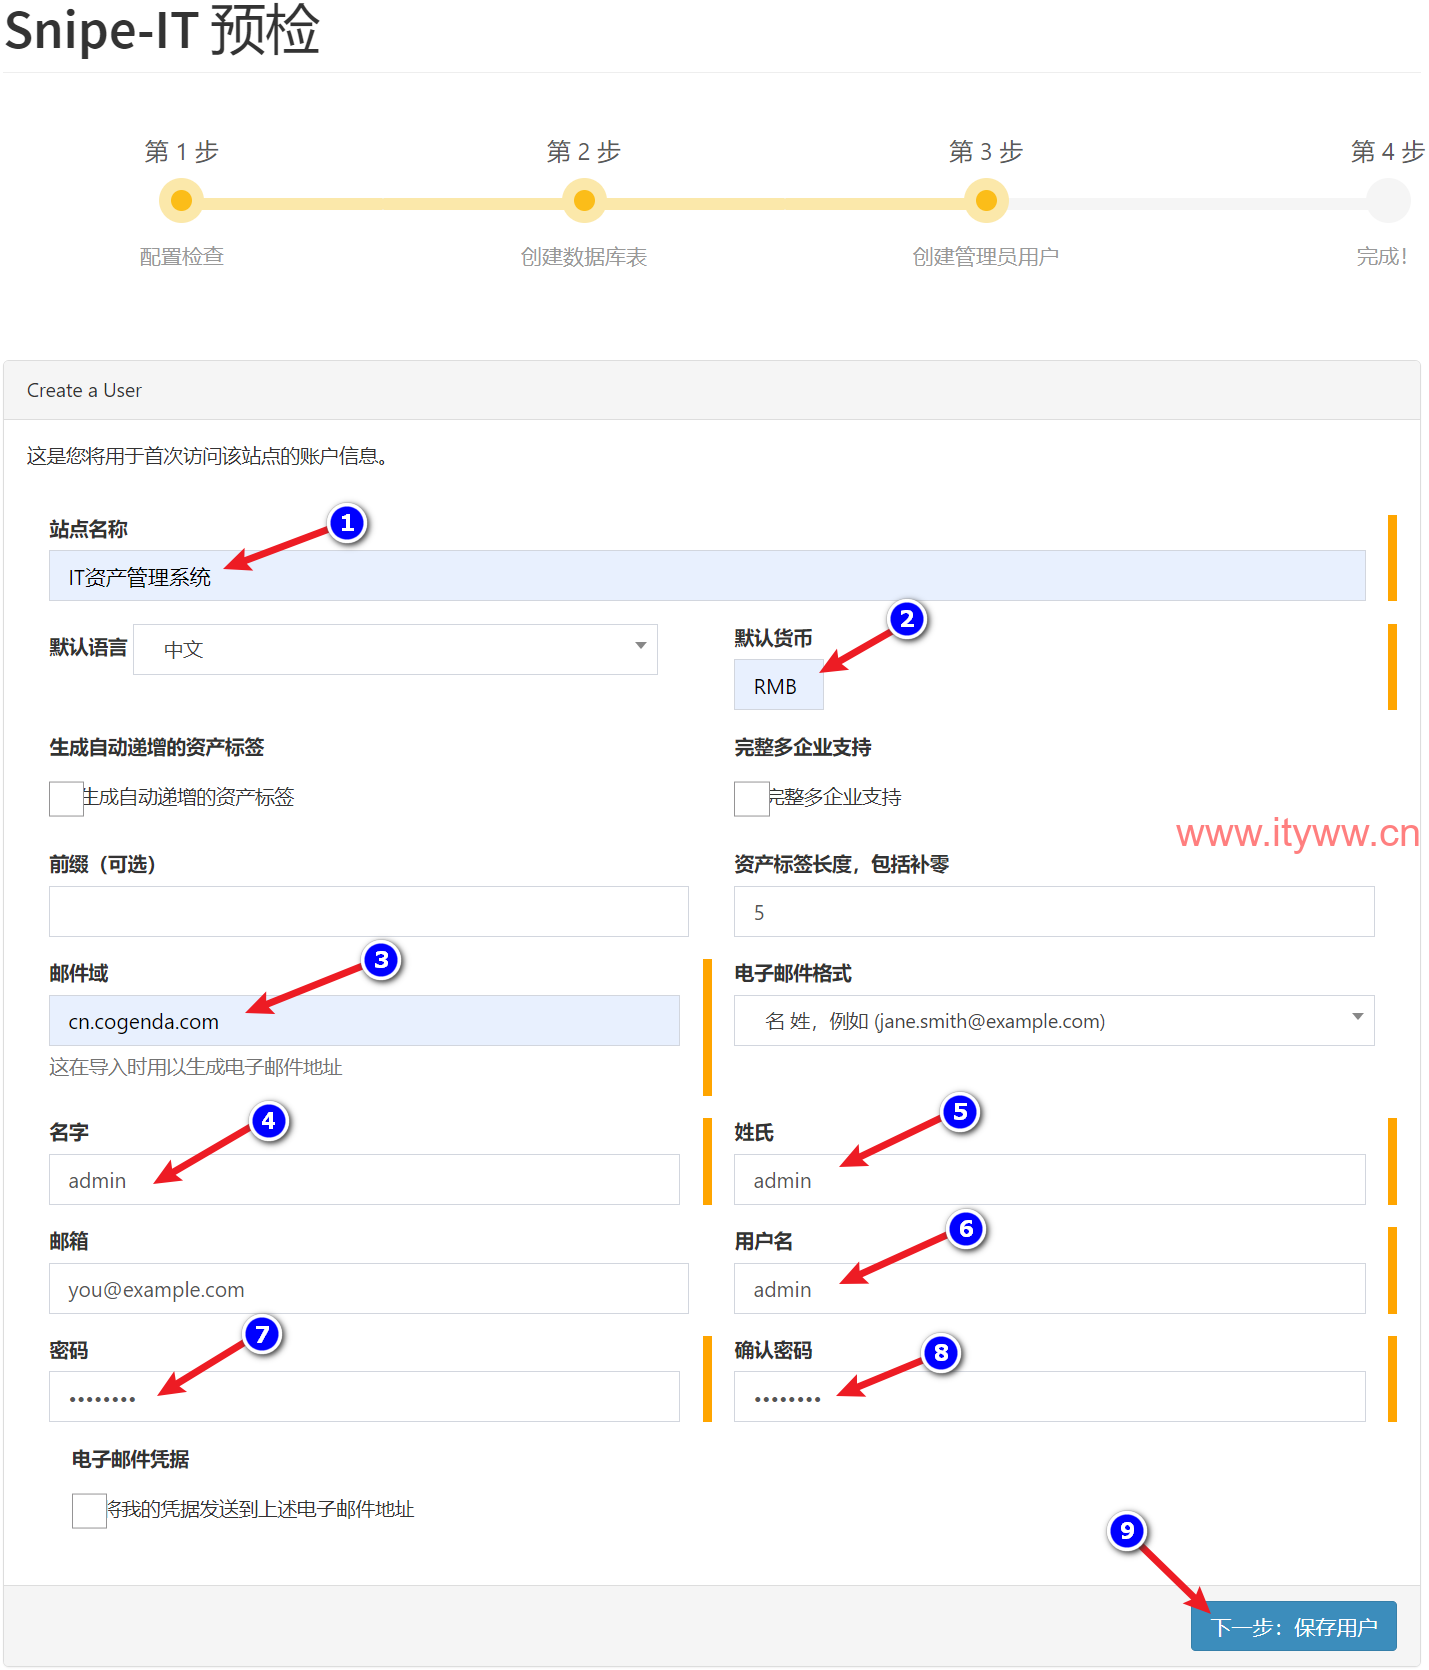
[v_blue]用户名很重要,其余的后面都可以更改,用户名就是登录账户,只可以在此定义,后面不可修改。[/v_blue]
