共计 2758 个字符,预计需要花费 7 分钟才能阅读完成。
一、说明
1、在 Zabbix 7 中创建 Linux 主机的过程主要包括以下几个步骤,从 Zabbix Web 界面添加主机、配置主机参数、关联模板,到最终验证数据采集是否成功。
2、Zabbix Server 能访问 Agent 主机端口,默认 10050;如果使用主动模式或加密通信,确保对应配置一致;
3、本实例我们以 RockyLinux9 为例安装 Agent并添加主机操作。
二、安装 Zabbix Agent2
1、查验Zabbix Server版本:zabbix_server -V
# zabbix_server -V
zabbix_server (Zabbix) 7.0.15
Revision d72b831a577 18 June 2025, compilation time: Jun 20 2025 00:00:00
Copyright (C) 2025 Zabbix SIA
License AGPLv3: GNU Affero General Public License version 3 2、安装 zabbix-agent2 包:dnf install -y https://mirrors.aliyun.com/zabbix/zabbix/7.0/rocky/9/x86_64/zabbix-agent2-7.0.13-release1.el9.x86_64.rpm
# dnf install -y https://mirrors.aliyun.com/zabbix/zabbix/7.0/rocky/9/x86_64/zabbix-agent2-7.0.15-release1.el9.x86_64.rpm
Last metadata expiration check: 0:33:36 ago on Sat 02 Aug 2025 08:09:57 PM CST.
zabbix-agent2-7.0.15-release1.el9.x86_64.rpm                         8.8 MB/s | 6.2 MB     00:00
Dependencies resolved.
=====================================================================================================
 Package                 Architecture     Version                       Repository          Size
=====================================================================================================
Installing:
 zabbix-agent2           x86_64           7.0.15-release1.el9           @commandline       6.2 M

Transaction Summary
=====================================================================================================
Install  1 Package

Total size: 6.2 M
Installed size: 21 M
Downloading Packages:
Running transaction check
Transaction check succeeded.
Running transaction test
Transaction test succeeded.
Running transaction
  Preparing        :                                                                         1/1
  Running scriptlet: zabbix-agent2-7.0.15-release1.el9.x86_64                                1/1
  Installing       : zabbix-agent2-7.0.15-release1.el9.x86_64                                1/1
  Running scriptlet: zabbix-agent2-7.0.15-release1.el9.x86_64                                1/1
  Verifying        : zabbix-agent2-7.0.15-release1.el9.x86_64                                1/1

Installed:
  zabbix-agent2-7.0.15-release1.el9.x86_64

Complete!3、配置zabbix Agent配置(/etc/zabbix/zabbix_agent2.conf)文件,把Server参数和ServerActive参数都配置Zabbix Server服务器地址,把Hostname参数配置本地主机名。
Server=172.16.2.11
ServerActive=172.16.2.11
Hostname=Agent端的Hostname
4、启动Zabbix Agent并加入自启动:systemctl enable –now zabbix-agent2.service
# systemctl enable --now zabbix-agent2.service
Created symlink /etc/systemd/system/multi-user.target.wants/zabbix-agent2.service → /usr/lib/systemd/system/zabbix-agent2.service.
三、Zabbix Web中添加主机
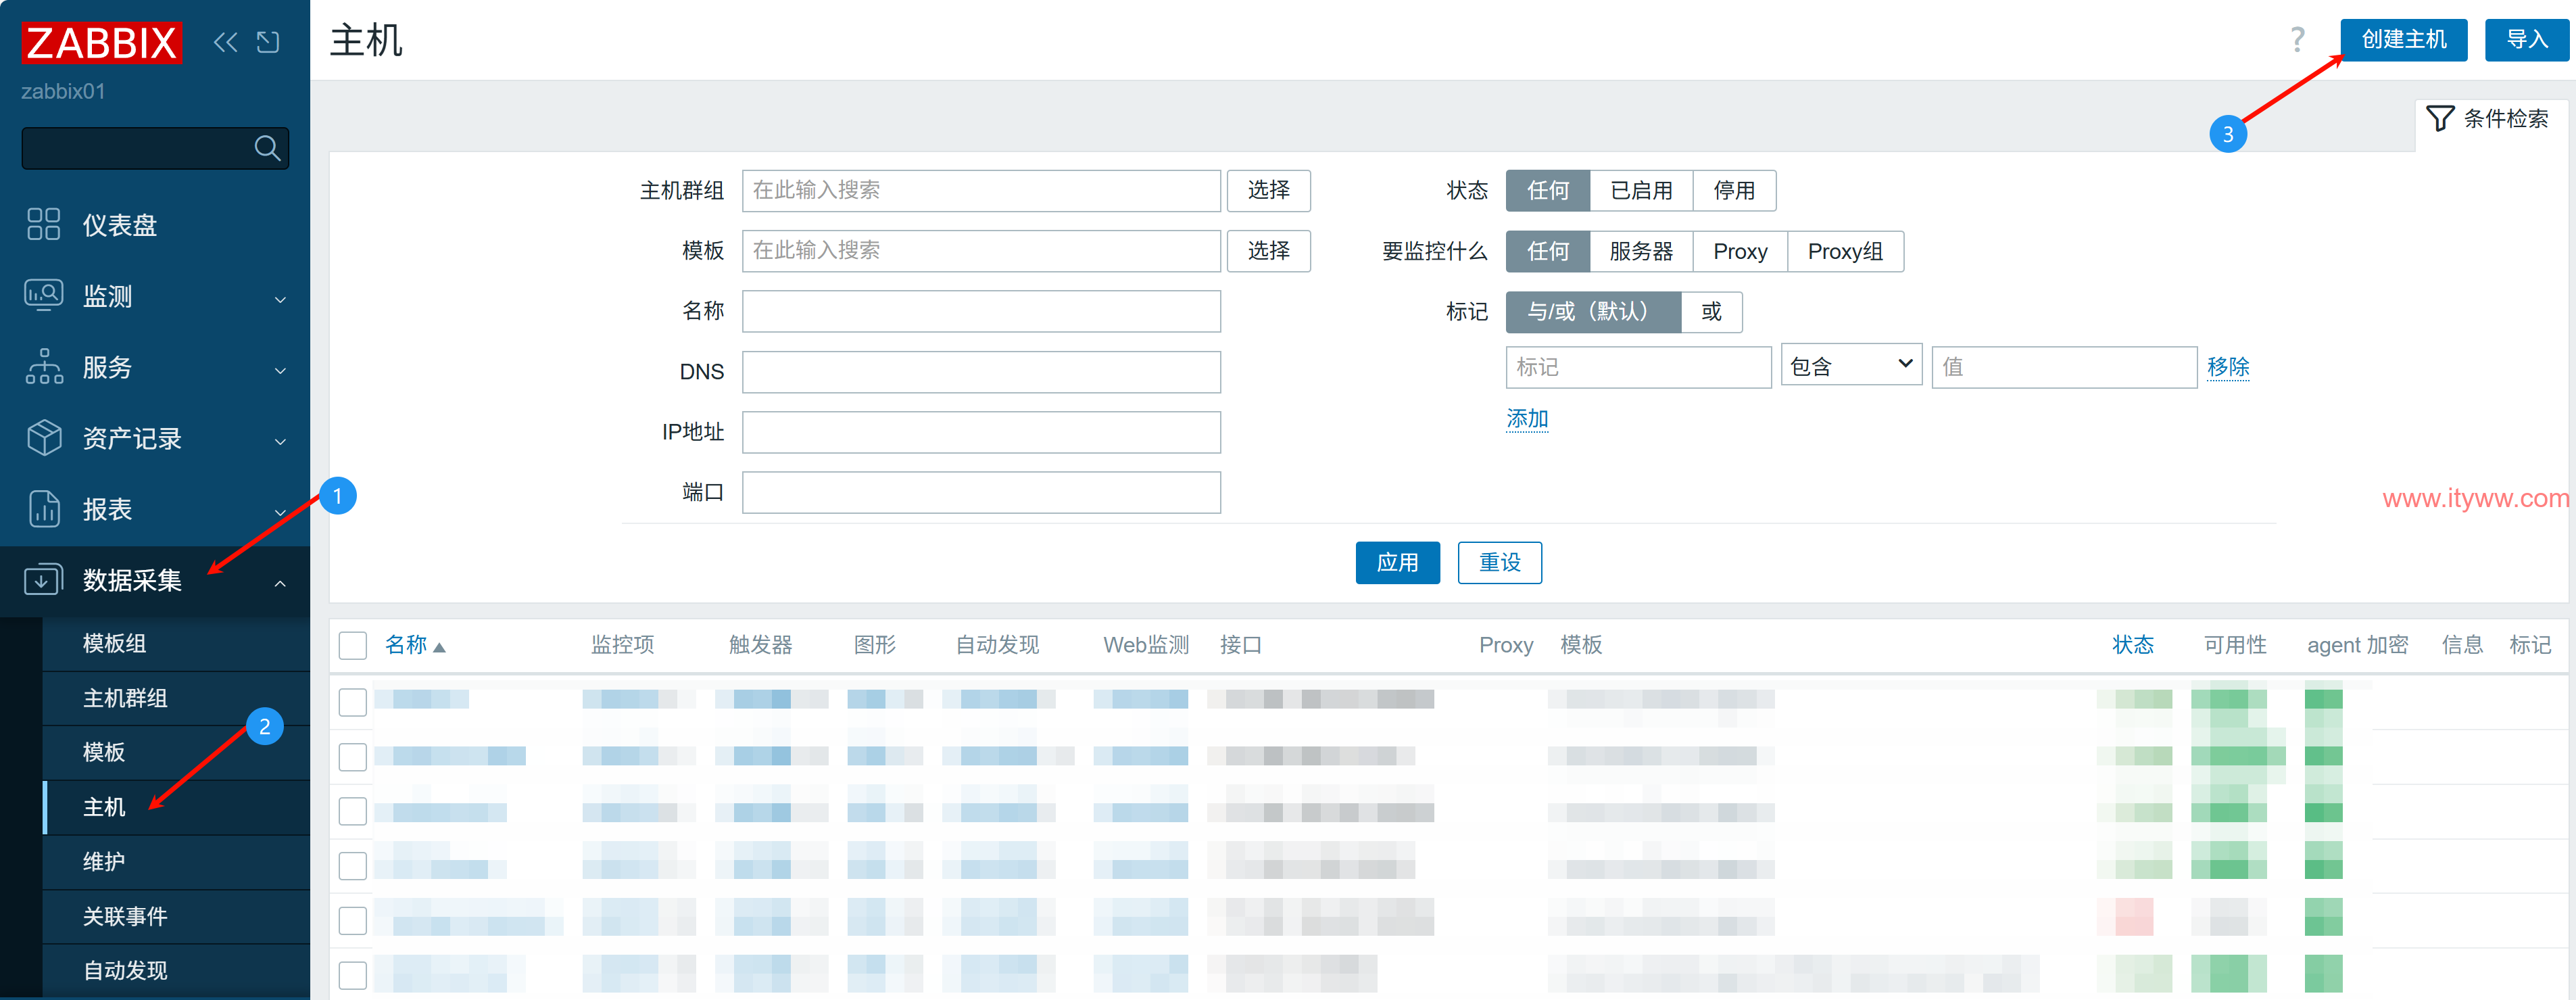
1、创建主机:数据采集>>主机>>创建主机

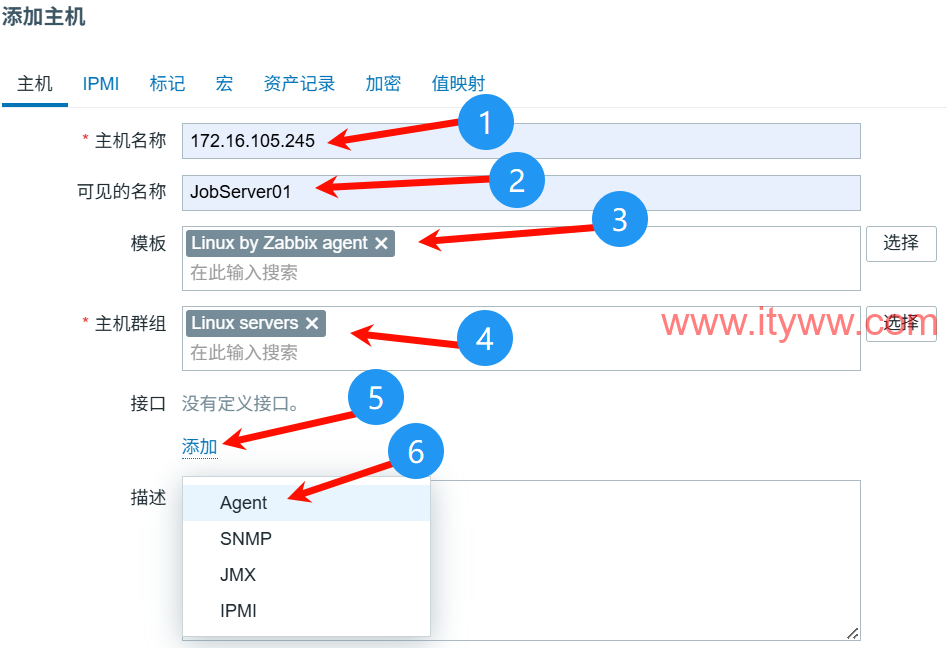
2、配置Agent主机基础信息:
主机名称:Agent主机的IP
可见的名称:用于前台显示便于辨识的名称
模版:输入关键词下拉菜单选择(或从右侧“选择”按钮选择)“Linux by Zabbix agent”
主机群组:输入关键词下拉菜单选择(或从右侧“选择”按钮选择)”Linux server”
接口:点击“添加”选 Agent

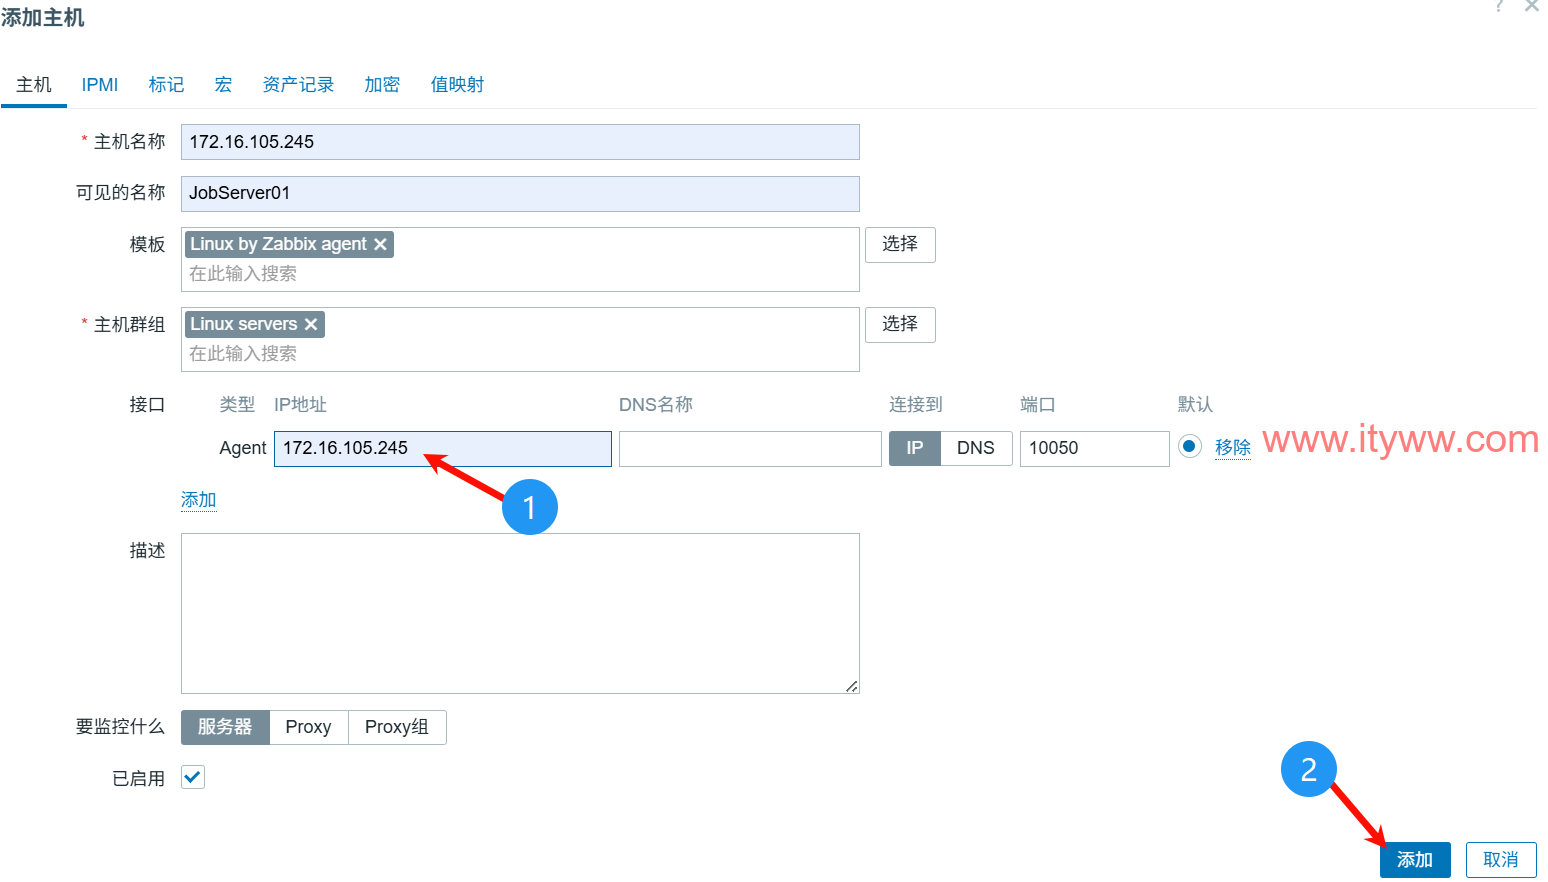
3、输入Agent主机的IP后点击“添加”按钮创建主机

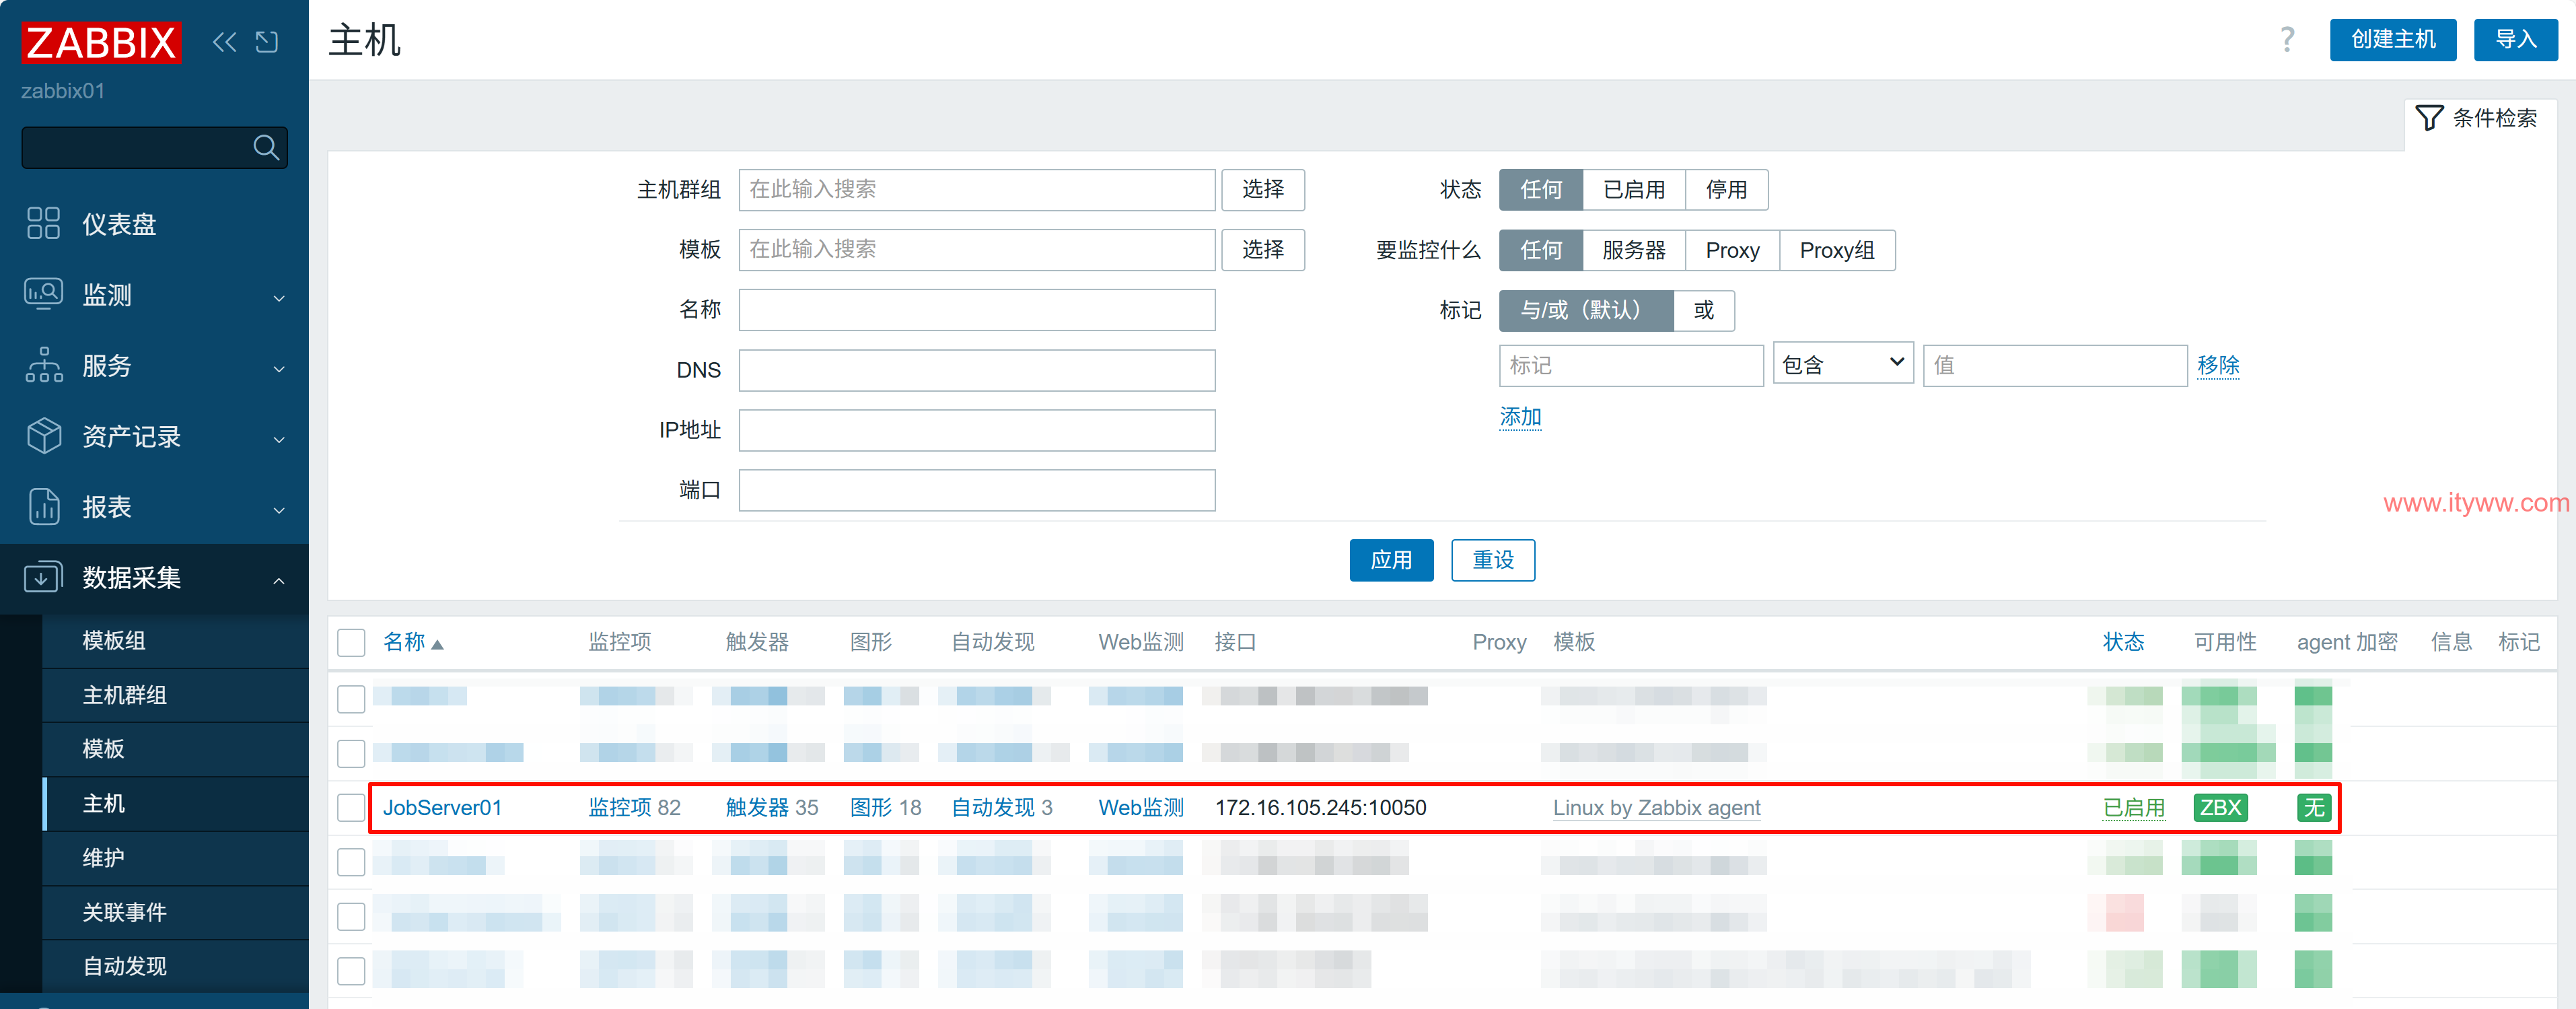
4、验证主机生效:看到刚添加的主机的可用性的“ZBX”变成绿色时表示生效并采集到数据

